Showing posts with label gluten free. Show all posts

Tuesday, May 27, 2014

Joy the Baker's Strawberry Cream Scones (GF & V)


Joy the Baker is one of my favorite bakers in the world. You can trust that all of her recipes are going to be completely delicious. Unfortunately, she is not gluten-free or vegan, so sometimes I have to make adjustments. (I am not technically vegan, but I am allergic to eggs and partially to dairy, so some of my recipes are.)

I have already made these scones twice, and everyone I have shared them with has loved them. Even my skeptical gluten-free eaters loved these scones. They are sweet, but not too sweet, fluffy, soft, and nutty in flavor.

Another thing I love about these scones is that they are incredibly simple to make. If you are debating between these and pancakes this weekend, go with these. They are just as simple and are a good change from pancakes or muffins. They are also quite healthy, with only 1/3 cup of sugar for the entire recipe. I also used coconut cream instead of buttermilk, so you get healthy fats in there too.

Go ahead and make these already!


Strawberry Cream Scones
Adapted from: Joy the Baker

Ingredients:
1 3/4 cup almond flour
1 1/4 cup gluten-free all purpose flour (I used Jules)
1 tbsp baking powder
1 tsp salt
1/3 cup coconut sugar (or granulated)
1 tsp of pure vanilla extract
1 1/3 cup of coconut cream** plus more for brushing the top or for whipped cream
3/4 cup of coarsely chopped strawberries
Turbinado, granulated, or brown sugar for topping

Directions:

  1. Place baking rack in upper third of oven and preheat to 425 F. Line a baking sheet with parchment paper.
  2. In a medium bowl, whisk together flour, baking powder, salt, and sugar.
  3. In liquid measuring cup, mix vanilla extract and coconut cream.
  4. Drizzle cream into flour mixture and slowly toss ingredients together until incorporated but still slightly dry.
  5. Add strawberries and continue gently tossing until cohesive, but not overly sticky. 
  6. Dump the dough onto a lightly floured surface and knead dough to 3/4 inch thick.
  7. Use a small biscuit cutter or small glass lightly floured to cut 1 1/4 inch circles from the dough.
  8. Brush each circle with coconut cream and sprinkle a generous amount of turbinado sugar on top.
  9. Place 1 inch apart on baking sheet and bake for 11-13 minutes or until golden brown.
  10. Remove from oven and serve warm with chilled coconut cream on top.
**Trader Joe's makes this excellent Extra Thick & Rich Coconut Cream that comes out of the can exactly like whipped cream if you do not shake it. I used this in my recipe mixed with a little almond milk to make it like buttermilk consistency and used the rest on top of each scone. Preserves go really well with these too.


Enjoy!!

Tuesday, May 13, 2014

Spiced Chicken with Wild Rice & Veggies Bowl (GF)


One of my best pieces of advice for those who are busy but want to eat healthy or for people who want to lose weight, is to prepare your meals ahead of time. I make my meals for the week on Monday nights. 

This is what I came up with for this week. This spiced, sweet, and crunchy little bowl contains turmeric and cumin spiced chicken, wild rice, broccolini, sweet potatoes, carrots, pea shoots, and pomegranate seeds. It is quite a great combination of foods. You can also make it vegan or vegetarian by substituting tofu or chickpeas for the chicken.


Spiced Chicken with Wild Rice & Veggies Bowl
Adapted from: Love and Lemons

Ingredients:
1 lb of chicken breast or tenders, cubed (preferably free-range; omit if vegan/vegetarian & use chickpeas)
1 cup wild rice
2 sweet potatoes, cubed
1 cup carrots, shredded
2 cups broccolini, roughly chopped
1 cup pomegranate arils
1 tsp cumin
1 tsp turmeric
1/2 tsp cayenne pepper
2 tbsp of gomacio or sesame seeds
2-3 tbsp olive oil
salt & pepper to taste
soy sauce or coconut aminos
pea shoots

Instructions:
  1. Cook wild rice as instructed on the package.
  2. While rice is cooking, dice chicken, season with salt and pepper, and cook in large skillet over medium-high heat in 2 tbsp of olive oil.
  3. After about 5 minutes, add cumin, turmeric, and cayenne pepper.
  4. Cook chicken all the way through and remove from skillet with slotted spoon. Add cubed sweet potatoes and cook until tender. (You may have to add 1 more tbsp of olive oil.)
  5. Add broccolini and carrots to skillet, season with salt, pepper, & sesame seeds and cook until tender.
  6. When all ingredients are cooked, add all cooked ingredients to a large bowl with a handful pomegranate and pea shoots. You might want to add soy sauce or coconut aminos to your rice. 
  7. Enjoy!!


Tuesday, May 6, 2014

Cauliflower Mac & Cheese (GF & V)


Oh the joys of being able to have macaroni and cheese again. I cannot explain to you how much this recipe saved my life. Whoever discovered that cashews, eggplant, cauliflower, and nutritional yeast tastes like cheese is my hero.

If you are wondering whether "normal" people like this: Yes, my boyfriend liked this recipe and he has no known allergies. 

Its funny how people forget that people with food allergies have normal taste buds just like everyone else. It's actually not funny at all. It gets really old. I've only had allergies for 3 years, so I tasted "normal" things for the first 22 years of my life. 

Let's step away from this little rant before I write 5 paragraphs on it.... This macaroni and cheese actually has vegetables in it, meaning you can eat more of it! Its very thick and creamy. Everything you would want in a mac & cheese. You might want to add more liquid to make the cheese a bit more runny. It might seem like a lot of steps, but its actually quicker than you think.


Vegan Broccoli & Kale "Cheese" Soup


This soup may not sound delicious, but it is. I've already made it twice this year. I think this might be the only dish that I've made twice too, so it's a big deal.

Forget detox diets, this soup is a detox. You get an incredible amount of vegetables in a tiny little bowl. You aren't eating real cheese, so you have nothing to "feel bad" about. My boyfriend made some Broccoli Beer Cheese soup for us the week before, and this actually tasted just like it. I added a bit of gluten free beer to one of my batches because I had it at the house. So feel free to add that as well.

Vegan Broccoli & Kale Soup
Adapted from: Blissful Basil

Ingredients:
4 small heads broccoli, de-stemmed and chopped into 1-inch pieces (you should have approximately 8 cups of florets)
1 large leek, thoroughly cleaned, cut in half lengthwise and thinly sliced
1 head of lacinato kale, de-stemmed and chopped
2½ tablespoons olive oil
4 cups plain, unsweetened almond milk, divided
¾ cup hemp seeds
¼ cup + 2 tablespoons nutritional yeast
1 clove garlic
2 teaspoons smoked paprika
1 teaspoon turmeric
1½ – 2 teaspoons large grain sea salt, to taste
black pepper, to taste
Optional: dash of cayenne pepper & paprika

Directions:
  1. Preheat oven to 400 degrees Fahrenheit.
  2. Line a large baking sheet with parchment paper and line a small baking sheet with parchment paper.
  3. Spread the broccoli florets and leeks over the large baking sheet. Drizzle with 2 tablespoons olive oil.
  4. Roast the broccoli and leeks in the oven for 20-25 minutes or until just starting to turn golden and brown.
  5. While the broccoli starts to roast, spread the lacinato kale over small baking sheet. Drizzle with ½ tablespoon olive oil and massage oil into kale.
  6. Roast the kale in the oven along with the broccoli for 5-7 minutes or until just barely turning golden.
  7. While the veggies are roasting, add 3 cups almond milk, hemp seeds, nutritional yeast, garlic, paprika, turmeric, salt, and black pepper to a high-powered blender (I used an immersion blender). Blend for 1-2 minutes or until smooth.
  8. Heat a dutch oven or large stock pot over medium-low heat. Add the almond milk soup base to the pot.
  9. While the soup base starts to cook, add the broccoli, leeks, kale, and 1 cup almond milk to a very high-powered blender or food processor (again, I used an immersion blender) and process until as smooth as possible. This will take 10 minutes or so — patience is a soup-making virtue!
  10. Pour the blended broccoli mixture into the pot and whisk into the almond milk mixture.
  11. Add in a pinch of cayenne if desired, and simmer for 15 minutes.
  12. You may need to use an immersion blender to get the soup as smooth as desired.
  13. Serve and enjoy. (It's great with corn bread!)

Wednesday, February 19, 2014

Simon Majumdar's Life Saving Dahl


It is very easy to say that this is my favorite soup I've ever made when I am sick.

Eating this soup when you are sick, makes you forget the sickness instantly. All of a sudden, you can move your once achy muscles again, you can breathe through your nose, you can smell, you can taste, your sore throat disappeared. It really is incredible.

Unfortunately, they come back about an hour after you are finished, but some relief is better than none.

I found out about this soup and Simon Majumdar after listening to The Alton Browncast, AKA my new current listening obsession. Simon sounds lovely. I also ordered his book "Eat My Globe." It's a lovely read so far. I want to propose that he and I write "Eat My Gluten Free Globe" next. No one take my idea, or I will send you to court. This is in writing. :P

Anywho... on to this Life-Saving Soup....


Life Saving Dahl
Adapted from: Simon Madjumdar

Ingredients:
1 cup of red lentils (Toasted first in a dry pan. I use my fingers to stir and when it is too hot to touch, it is done)
1 unwaxed lemon chopped in quarters
1 onion sliced
1 cup frozen peas
2 cardamom pods (I used ground cardamom, around 1 tbsp)
2 cloves (I used ground cloves, around 1 tsp)
1 cinnamon stick (I used ground cinnamon, around 1 tbsp)
3 cloves garlic
3 fresh green chillies
2 inches of fresh ginger
1 tsp each of ground turmeric/ginger/cumin/coriander seed/hot chilli powder
½ tsp salt
1 tsp sugar
1½ Pints of water or stock (I used chicken stock)
1 Bag of spinach (washed)
1 lb chicken breast (Free Range), cut into 1/2 inch cubes

Instructions:
  1. Saute chicken cubes in olive oil until cooked all the way through. Put on plate and set aside.
  2. Make a paste by blending the ginger/garlic/fresh chilli with a little salt and water.
  3. Put 2 tablespoons of oil into a hot pan and when it comes to heat, add the cardamom, cloves and cinnamon stick. Cook for 1 minute on a low heat until they release their flavor.
  4. Add the onion and cook until it begins to soften and turn golden.
  5. Add the ginger/chilli/garlic paste and cook for two to four minutes until it loses its rawness.Add the ground spices, sugar and salt and mix well with the onions and cook out for 4 mins until the spices lose their rawness. If the mixture begins to stick add a little water.
  6. Add the lentils and mix well so all the pulses are covered with the mixture.
  7. Add 1½ pints of water/stock and the quartered lemons and simmer for 30 mins until the lentils have broken down. Add more water if it sticks. Some lentils may take a little longer.
  8. 15 minutes after adding the stock or water, add the frozen peas and chicken. Cook for at least 15 more minutes.
  9. Add the spinach, cover and allow to wilt.
Enjoy and feel better!!

Tuesday, January 14, 2014

Roasted Cauliflower and Parsnip Soup


This soup is incredible! It's pretty easy too. I got an Immersion Blender for Christmas, and have been blending up a storm. That thing is incredible. I prefer this to a blender any day, even for smoothies.

It's nice when you are making sauces and soups because you don't have to pour hot liquid into the blender and perhaps burn your hand... or burn your whole kitchen when the top comes off when you are blending. (I've seen my mom do it... it's a crazy, hot mess.) I highly recommend buying that. It really does step up your cooking game.

Okay, so on to the soup. It's creamy. It's savory. It's light and delicate. 

We made it for our meal and soon realized that it needed something to go with it. We ended up making bacon and spinach paninis, which I highly recommend as a side. Troy added cheese to his the second day and crumbled bacon in it. This also tastes delicious and very much like potato soup. Serve it up however you would like! It's so darn tasty.


Roasted Cauliflower and Parsnip Soup
Adapted from: Spoon Fork Bacon (One of my favorite food bloggers!)

Ingredients:

1 head of cauliflower florets, roughly chopped
2 parsnips, peeled and roughly chopped
2 shallots, peeled and quartered
3 garlic cloves, peeled and smashed
2 tablespoons minced thyme
1 tbsp minced sage, plus more for garnish
3 tablespoons extra virgin olive oil
1/2 teaspoon cumin
1/2 teaspoon smoked paprika
3 cups vegetable or chicken stock
1/4 cup sour cream** (I made mine dairy free/vegan... See Below)
salt and pepper to taste

Directions:

1. Preheat oven to 375˚F.
2. Spread cauliflower, parsnips, shallots, garlic, sage, and thyme onto a baking sheet, in a single layer, and drizzle with oil. Sprinkle with cumin, paprika, salt and pepper and toss everything together until the vegetables are well coated with oil.
3. Roast vegetables for 25-30 minutes, tossing vegetables around 15 minutes into the roasting process.
4. Meanwhile pour stock into a medium pot and bring to a simmer. Lightly season with salt and pepper.
5. Once vegetables have roasted through and stock is hot, use immersion blender to puree.
6. Puree mixture for 3 to 5 minutes or until the mixture is smooth. Add more stock and continue to puree if necessary.
7. Transfer the mixture into the pot that the stock was in and bring to a light simmer. Stir in sour cream and adjust seasonings.
8. Top each bowl with a drizzle of extra virgin olive oil and fresh sage leaf and serve.

**For the dairy free/vegan sour cream:
Take 1 container of Plain Coconut Milk Greek Yogurt (6 oz) and combine it with 3/4 tsp of lemon juice. Stir together and let chill in refrigerator, covered, for at least 30 minutes.
Many thanks to Cassidy's Craveable Creations for coming up with this alternative!!

Enjoy!!

Friday, January 3, 2014

Maple Roasted Winter Vegetables


Roasting vegetables is a brilliant thing. Roasting brings out complex flavors that are not found in other cooking methods. The best example is probably roasted cauliflower. That usually bland vegetable is transformed into a savory treat by just using the oven.

In this recipe, I've used a few fall favorites-- Sweet potatoes, brussel sprouts, and cranberries. You can really add whatever you would like, but I highly recommend the sweet potato/cranberry combination. They are the perfect compliment of sour and sweet. Cauliflower would be excellent with this.


Maple Roasted Winter Vegetables
Adapted from: Plainville Farms

1 lb sweet potatoes, sliced into 1/2 inch rounds
2 cups brussel sprouts
3/4 cup whole cranberries
1 tbsp olive oil
1 tbsp pure maple syrup
Salt & pepper

Directions:
1. Preheat oven to 400 F.
2. Combine olive oil, maple syrup, salt, and pepper in a large bowl.
3. Toss sweet potatoes, brussel sprouts, and cranberries in mixture.
4. Scatter onto sheet pan and bake for 35-40 minutes stirring half-way through.

Quick, easy, healthy, and delicious!

Enjoy!

Wednesday, October 16, 2013

Chicken Piccata with White Wine Lemon Sauce, Garlic Zucchini, & Capers


For some reason, I was craving this dish. Chicken Piccata is lovely and probably pretty hard to mess up. It's also very easy (always a plus). I think someone came up with this recipe because they only had these ingredients left in their kitchen. I feel like every Italian home has flour, olive oil, lemon, white wine, and capers.

I borrowed the recipe from Elise Bauer who started Simply Recipes, and adapted it to make it gluten free. I also made it dairy free by excluding the Parmesan cheese, which I thought I would miss, but it honestly doesn't need it. I also added the addition of zucchini and pasta, which I feel completes the dish perfectly.


Chicken Piccata with White Wine Lemon Sauce, Garlic Zucchini, & Capers
Adapted from Elise Bauer

Ingredients:
2-4 boneless, skinless chicken breasts (if you can find thin cutlets, do it! Go for 4 or more in this case.)
2 tbsp grated Parmesan cheese (optional, I did not use)
1/3 cup gluten free flour
Salt & pepper
2 tbsp olive oil
4 tbsp butter (or substitute, I used Soy-free Earth Balance)
1/2 cup of white wine (or chicken stock)
3 tbsp lemon juice
1/4 cup brined capers
1/4 cup chopped parsley
1-2 zucchini, chopped into spears
1 tbsp garlic
Gluten free corn pasta (mine was penne from Trader Joes)

Directions:
  1. Cut the chicken breasts horizontally, butterflying them open. You want your pieces to be as thin as possible, about 1/4 of an inch thick. If they are not, place between plastic wrap and pound with meat mallet. 
  2. Mix flour, salt, pepper, and parmesan, if using. Rinse the chicken pieces in water and dredge them in flour mixture until well coated.
  3. Heat 2 tbsp of olive oil and 2 tbsp butter in a large skillet over medium high heat. 
  4. Add chicken pieces to the pan and cook until brown on each side, about 5 minutes each. 
  5. In the mean time, start to boil pasta water and cook by the package's directions. **With gluten free pasta, ALWAYS rinse the pasta in strainer with cold water immediately after cooking.**
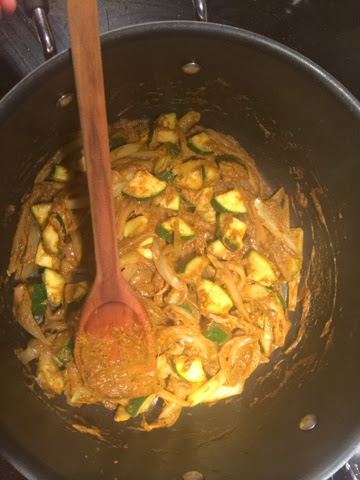
  6. Also heat smaller skillet over medium heat, spray with cooking spray, and cook zucchini spears and garlic until slightly browned.
  7. Remove chicken from pan and cover with aluminum foil to keep warm while you prepare the sauce. You might have to repeat this step for the chicken that wouldn't fit in the pan.
  8. After removing the chicken, deglaze the pan with white wine, then add lemon juice and capers.
  9. Use a spatula to scrape up the browned bits. Wait until the sauce has reduced down by half and whisk in 2 tbsp butter. 
  10. To serve, plate the pasta with zucchini and chicken, then top with the sauce. Garnish with Parsley. 
Cheers!

Tuesday, October 1, 2013

Turkey & Apple White Chili


These cool nights have put me in a soup mood. This week I made Turkey & Apple White Chili by EatInEatOut.  I was scared to try this recipe because it has apples in it. I couldn't get it out of my head, however, so I had to try it.

I couldn't have been happier with the results. IT IS DELICIOUS! You really must try it.

The flavors are incredible. The apples actually stay slightly crisp which adds a nice texture. It doesn't take too long to cook and is an inexpensive set of meals (it's just me, so I eat mine for days).


Turkey & Apple White Chili
Adapted from: EatInEatOut

Ingredients:
2 tbsp olive oil
1 lb ground turkey (antibiotic-free, free-range)
1 onion, diced
5 tsp chili powder (wheat-free)
2 tsp ground cumin
1 tsp smoked paprika
3 garlic cloves, finely chopped
salt & pepper
2 apples, cored and cubed (I used Granny Smith; you want something tart)
1 can chickpeas (drained and rinsed)
1 can red kidney beans (drained and rinsed)
2 tbsp butter alternative (I used soy-free Earth Balance)
2 tbsp gluten free flour
2 cups chicken broth (organic, free range)
1/4 cup fresh lime juice
green onions and cilantro (optional for garnish)

Directions:
  1. Place ground turkey in saucepan and cover with water. Heat over Medium Heat (simmering) until cooked all the way through, about 10 minutes. Drain and stir in cumin, chili powder, salt and pepper. 
  2. In large soup pot, heat 2 tbsp olive oil. Add apples, garlic and onion and cook, stirring until softened, about 5 -7 minutes. 
  3. In the same pan, melt butter over medium-low heat. Whisk in flour and cook for 2 minute. 
  4. Slowly whisk in chicken broth bringing to a simmer. Cook until thickened; about 5 minutes. 
  5. Add turkey and beans. Continue to simmer for 7-10 more minutes. 
  6. Stir in lime juice and heat through. Re-season with salt & pepper if needed. 
  7. To serve, top with green onions and cilantro if using. 
Happy Eating!

Tuesday, September 24, 2013

Sweet Corn and Vegetable Chowder


It has been too long since I've posted. I'm not sure anyone really visits my blog, but that's okay. Maybe one day. My recipes are all delicious and very allergy friendly.

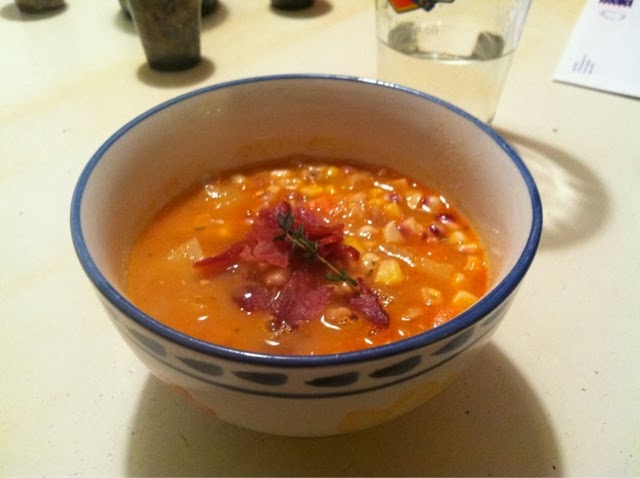
This Sweet Corn and Vegetable Chowder took a while to make, but it was delicious and worth the time. The amount of leftovers you have after can last you majority of the week. Or a few days if you are feeding two or more.

I found the recipe on Pinterest, but the blog where it is from is called "the dinnervine." Their recipes all look delicious.

I followed the recipe for the most part, but I omitted the cheese and used unsweetened almond milk to make it dairy free. I saw some tips from famous food bloggers today, and they suggested using cashew cream. This is made by soaking 1 cup of raw cashews in water for 6-8 hours, draining and rinsing them, and then blending them with 3/4 cup of water until smooth. Definitely trying that next time for the half and half.

I also used Yukon Gold potatoes from the farmer's market because they contain more nutrients than white baking potatoes. In the pictures you will see red corn that I actually got for FREE from Earth Fare because they had to pull it off the shelves after so many days and it was still perfectly fine. It's sad to think about how much food we waste because of expiration dates which are actually just an estimate.


Sweet Corn and Vegetable Chowder
Adapted from: the dinnervine

Ingredients:
7 ears fresh white corn, kernels cut off cobs
5 yukon gold potatoes, peeled and chopped into small cubes
1/2 large sweet white onion, chopped finely
1 large carrot, chopped finely (or 2 small carrots depending)
4 large cloves garlic, chopped
1, 32 oz carton free-range chicken stock
3 T dairy-free, soy-free butter
1 bay leaf
1/2 cup white wine
1/2 cup unsweetened almond milk (plain, not vanilla)
2 tbsp gluten free flour (optional, but I used to thicken soup)
5 strips bacon (or turkey bacon), for crisping, topping and reserving drippings
2 tsp fresh thyme leaves, chopped smaller
fresh thyme sprigs for garnish & sautéing
1-2 tsp kosher salt (to taste)
1-2 tsp coarse ground black pepper
1 tsp paprika
1/4 tsp red wine vinegar

Directions:
1. Cut corn kernels off cobs, set aside.
2. Preheat a large dutch oven, or enameled cast iron soup pot, melt 1T of the butter and crisp all 5
strips of bacon, chopped.
3. Once bacon is crisp, remove from pot & drain on paper towels, setting aside for garnish.
4. Reserving bacon drippings, to pot add chopped potato and sauté on medium for about 6 min,
stirring often.
5. To pot now add onion, garlic, carrot, salt, pepper, and remaining 2 T butter.
6. Sauté mix adding 1/2 cup of the chicken stock carton and a few thyme sprigs (will remove later), for
about 10-15 minutes.
7. Once mixture is tender, remove thyme sprigs, add the corn kernels, chopped thyme, paprika, bay leaf rest
of chicken stock and bring to a slow boil with lid on.
8. Once beginning to boil, remove lid and reduce heat to low, continue to simmer for about 10
minutes.
9.  Add white time and remove the bay leaf.
10. Remove hot pot from heat and allow to cool substantially**, then slowly add some of the almond milk

and around a tablespoon of gluten free flour, return pot to low heat, stirring well (Soup will begin to thicken).
11. Gradually add more almond milk, a tbsp of gluten-free flour, salt & pepper as desired.
12. Add the red wine vinegar if you feel a little acid is necessary; I did and it worked well!
13. Continue to simmer on low until ready to serve & eat!**
14. Garnish with bacon and fresh thyme sprig.

** I noticed that the almond milk dramatically reduced the temperature of the soup, so you might not want to wait for it to get too cool because it will take a while to heat back up. You also might have to turn it up to medium or medium-low to heat back up.

Enjoy!!

Monday, July 15, 2013

Salmon Tacos with Mango Salsa


This recipe is delicious and healthy.

So, why wouldn't you try it?? It's easy too, so skip that excuse as well.

Wild Caught Salmon is full of Omega-3s, which help reduce inflammation (the basis of every disease and illness), promotes brain function, and assists cell production.


Salmon Tacos with Mango Salsa Recipe
Adapted from: Alison Needham

Ingredients:
1 1/2 pound salmon filet with skin on
1 teaspoon chili powder
1/4 teaspoon salt
1/4 teaspoon sugar
1/4 teaspoon cumin
corn tortillas
1 avocado, sliced
feta cheese, optional

Salsa:
1 mango, skinned and cut into small dice
1/2 cup diced red onion
1/2 cup diced red bell pepper
handful chopped cilantro
1 jalapeno pepper, seeded and minced
1/2 juice lime
pinch salt

Directions:
  1. Pat the salmon dry. Combine the chili powder, sugar, salt and cumin in a small bowl and sprinkle over the surface of the flesh-side of the salmon. Set aside.
  2. Prepare the salsa. Combine all ingredients in a medium bowl. Taste for seasoning, cover and refrigerate.
  3. Spray the grill with cooking spray and light a medium-hot flame. To test heat on a charcoal or gas grill, hold your hand about 5 inches over the flame. You should only be able to keep it there for 3-4 seconds.**
  4. Place salmon skin side down on the grill, cover and cook for about 5 minutes, depending on the thickness of the fish (cook fish about 10 minutes per inch of thickness). Flip salmon over, peel off the skin and cook for 3 minutes more, or until the fish flakes easily with a fork. Remove from heat and place it pink flesh up on a plate. (The underside of the skin will be an unattractive gray color).
  5. Place the corn tortillas on the grill for a few seconds a side to warm up. Flake fish and divide evenly between the tortillas. Top with mango salsa, sliced avocado, and feta cheese. Serve immediately with lime wedges.

**You can also prepare the Salmon in a pan on the stove. Cook as stated above over Medium Heat with olive oil in pan.

Enjoy!

Wednesday, June 26, 2013

Jane Iredale Makeup

It's time for me to review another beauty product! This time it's a whole line. Jane Iredale has an incredible line of mineral makeup.... Truly mineral that actually has skin-care benefits. Her makeup is great for sensitive skin and actually cures some skin disorders.

You can go to her website and actually read the ingredients. Most of her makeup is Vegan, Gluten Free, and Cruelty Free. She uses natural preservatives that are allergen free.

Unlike some beauty blogs, I have actually been using her products for 9 months now. I absolutely love them! I have combination skin that breaks out very easily. I've battled with acne all of my life, so that means that I have battled with makeup that really conceals blemishes all of my life. I use her Disappear Concealer with Green Tea Extract, which actually works great on acne and under-eye circles. I apply the concealer first and then dab Bare Minerals Concealer over the top for extra coverage. Then I use Jane Iredale's PurePressed Base Mineral Foundation over the top of that. It is supposedly anti-microbial so it keeps bacteria off the surface of your face. It seems to be working, because my acne has improved. The concealer is also supposed to heal blemished instead of dry them out. I have also tried their Eyeliner Pencil in Midnight Blue, but it tends to fade easier than I would like. It might just be the color though.

If you have problem skin at all or are just looking for a great natural makeup free of harsh dyes and preservatives, check it out! It is definitely worth the money. I haven't even put a dent in my powder or concealer in 9 months!

Enjoy!

Thursday, June 13, 2013

Sesame Avocado Spring Rolls


I was feeling in the mood for something new, something fresh, something healthy and packed with vegetables, and then I stumbled upon these delicious spring rolls! Sesame crusted avocado and cabbage spring rolls?!? Yes, please.

I had never made spring rolls before, but they are quite simple. I can't wait to try my own rendition of these. Naturally Ella does a brilliant job of combining a simple, tasty treat. I would recommend not using as much lime juice, a half a lime will do. If you want this recipe to be more healthy, just skip the pan-frying of the avocado and just roll it in the sesame seeds. They shouldn't have a problem sticking. These would also be great with chicken or pork strips. Oh! Another added bonus is that they are Gluten Free, Dairy Free, Egg Free, Soy Free, and Vegan.


Sesame Crusted Avocado Spring Rolls
Adapted from: Naturally Ella

1/2 head red cabbage
1 carrot, shredded through grater
Juice from 1/2 lime
1 tbsp honey
2 ripe avocados
1/4 cup sesame seeds
1 tbsp sesame oil (olive works too)
6-8 spring roll wrappers
1/4 cup cilantro
Soy Sauce or Coconut Aminos*

1. Shred cabbage and carrot and toss with lime juice and honey. Set aside.
2. Slice avocado in half, remove pit, and slice down the middle length-wise. Remove skin, and slice into 1/2 inch slices.
3. Roll slices in sesame seeds until covered.
4. Heat oil over medium-high heat and place avocado in skillet. Cook until golden brown, about 2 minutes on each side.
5. Fill bowl with hot water to dip the spring roll paper in (a bowl that is wide enough to submerge the entire paper in works best).
6. Soak rice paper for 10-15 seconds (not too soft, just pliable), and place on cutting board or counter.
7. Place a small handful of the cabbage-carrot mixture in the center of the spring roll, and top with avocado and a sprinkle of cilantro.
8. Roll the spring roll by tucking one side over the food in the middle, fold in the sides, and continue rolling. You can roll them pretty tightly. It's surprising that they are tough to break.
9. Slice in half and serve with soy sauce or coconut aminos.

* Coconut Aminos are a great substitute for soy sauce for those of you who might be allergic to soy, like I am, or for those who are avoiding high-sodium foods. It looks and tastes exactly the same and is much better for you. You should be able to find it in Whole Foods, Earth Fare, or something similar. 

Enjoy!!